Category: INFORMATIONS

INFORMATIONS ABOUT MEDICAL DEVICES  AI BUILT IN

  • LIST OF PORTS ON MEDICAL DEVICE

    LIST OF PORTS ON MEDICAL DEVICE

    You’re right to be curious about the ports on medical devices! They are essential for connectivity, data transfer, and various functionalities. Here’s a breakdown of common ports you might find on medical devices:

    1. DATA TRANSFER AND COMMUNICATION

    • USB (Universal Serial Bus): Extremely common for connecting to computers, peripherals, and charging. It comes in various types (USB-A, USB-B, USB-C, Mini-USB, Micro-USB), each with different shapes and capabilities.
    • RS-232 (Serial Port): An older standard, still used for some devices for simple data communication.
    • Ethernet: For networking and connecting to hospital information systems (HIS) or local networks.

    2. DISPLAY  AND OUTPUT

    • VGA (Video Graphics Array): An older standard for connecting to external displays (monitors).
    • DVI (Digital Visual Interface): A digital video interface for higher-quality display connections.
    • HDMI (High-Definition Multimedia Interface): A modern standard for transmitting high-definition video and audio.
    • DisplayPort: Another digital display interface, often found on newer devices.

    3. AUDIO

    • 3.5mm Headphone Jack: The standard audio jack for headphones or speakers.

    4. SPECIALIZED MEDICAL PORTS

    • ECG/EKG Ports: For connecting electrocardiogram leads to monitor heart activity.
    • SpO2 Ports: For connecting pulse oximeter sensors to measure blood oxygen levels.
    • Blood Pressure Ports: For connecting blood pressure cuffs.
    • Temperature Probe Ports: For connecting temperature probes.

    5. OTHER PORTS

    • Power Connectors: For supplying power to the device. These can vary widely in shape and size.
    • DC Power Jack: A common type of power connector.

    WHY ARE THESE PORTS IMPORTANT?

    • Data Transfer: To transfer data between the medical device and a computer, another device, or a network. This is crucial for storing patient information, analyzing data, and updating software.
    • Connectivity: To connect to external devices like monitors, printers, or other medical equipment.
    • Charging: To charge the device’s battery.
    • Communication: To allow the device to communicate with other systems or devices.

    When looking at medical devices, understanding the types of ports they have can give you valuable insights into their capabilities, connectivity options, and potential for integration with other systems.


  • HOW STEP BY STEP CONNECT AI THROUGH THE CLOUD A MEDICAL DEVICE

    HOW STEP BY STEP CONNECT AI THROUGH THE CLOUD A MEDICAL DEVICE

    AI THROUGH THE CLOUD
    AI THROUGH THE CLOUD

    Connecting a medical device to AI through the cloud involves several key steps and careful considerations. Here’s a step-by-step guide:

    .1 CHOOSE A CLOUD PLATFORM AND AI SERVICES:

    • Select a cloud provider: Choose a reputable cloud provider that offers the AI services you need. Popular options include:
      • Google Cloud Platform (GCP): Strong in machine learning, natural language processing, and image analysis.  
      • Amazon Web Services (AWS): Offers a wide range of AI services, including Amazon SageMaker for building and deploying models.  
      • Microsoft Azure: Provides a comprehensive suite of AI tools and cognitive services.  
    • Identify relevant AI services: Determine the specific AI capabilities you need, such as image analysis, natural language processing, or predictive analytics. Choose the appropriate AI services offered by your cloud provider.

    2. DEVICE CONNECTIVITY:

    • Enable connectivity: Ensure your medical device has the necessary hardware and software for connectivity. This might involve:
      • Embedded Wi-Fi or cellular modules: For direct internet access.
      • Bluetooth: To connect to a smartphone or gateway device that has internet access.  
    • Secure data transfer: Implement robust security measures to protect sensitive patient data during transmission to the cloud. Use encryption protocols like TLS/SSL and secure authentication methods.  

    3. DATA ACQUISITION AND PREPROCESSING:

    • Collect data from the device: Gather the relevant data from the medical device’s sensors or internal systems. This might involve physiological signals, images, or other health-related information.
    • Preprocess the data: Prepare the data for AI analysis by cleaning, normalizing, and transforming it into a suitable format. This might involve removing noise, handling missing values, or converting data types.  

    4. DATA TRANSFER TO THE CLOUD:

    • Establish a secure connection: Create a secure connection between the medical device and the cloud platform using appropriate protocols and authentication methods.
    • Stream or batch data: Depending on the application, you can either stream data continuously to the cloud or send it in batches at specific intervals.
    • Store data securely: Store the data in the cloud using secure storage services provided by your cloud provider. Consider encryption and access control mechanisms to protect patient privacy.

    5. AI MODEL INTEGRATION:

    • Access AI services: Utilize the AI services provided by your cloud platform to analyze the data. This might involve using pre-trained models, building custom models, or using APIs for specific AI tasks.
    • Process data in the cloud: The AI models in the cloud will process the received data and generate insights, predictions, or classifications.
    • Return results to the device: Send the AI’s output back to the medical device for display, further processing, or to trigger specific actions.

    6. DEVICE INTEGRATION AND USER INTERFACE:

    • Integrate AI output: Integrate the AI-generated insights into the medical device’s functionality. This might involve displaying results on the device screen, triggering alarms, or adjusting device settings.
    • Design a user interface: Create a user-friendly interface that allows users to interact with the AI features and understand the results.  

    7. TESTING AND VALIDATION:

    • Thoroughly test the system: Test the entire system, including data transfer, AI processing, and device integration, to ensure accuracy, reliability, and security.
    • Validate AI performance: Validate the performance of the AI models on real-world data to ensure they meet the required accuracy and clinical efficacy.

    KEY CONSIDERATIONS:

    • Data privacy and security: Implement strong security measures to protect patient data throughout the process, complying with regulations like HIPAA and GDPR.  
    • Latency: Minimize latency in data transfer and AI processing to ensure real-time or near real-time performance, especially for critical applications.  
    • Reliability: Ensure the system is reliable and resilient to network disruptions or other issues.
    • Scalability: Design the system to handle increasing amounts of data and user requests as needed.

    By carefully following these steps and considering the key considerations, you can successfully connect a medical device to AI through the cloud, enabling innovative features and enhancing patient care


  • WHAT ARE THE STEPS TO CREATE A MEDICAL DEVICE AI BUILT IN

    WHAT ARE THE STEPS TO CREATE A MEDICAL DEVICE AI BUILT IN

    WHAT ARE THE STEPS TO CREATE A MEDICAL DEVICE AI BUILT IN
    WHAT ARE THE STEPS TO CREATE A MEDICAL DEVICE AI BUILT IN

    Creating a medical device with AI built in is a complex but rewarding journey that requires a multidisciplinary approach. Here’s a breakdown of the key steps involved:

    1. IDENTIFY  A CLINICAL NEED AND DEFINE THE PROBLEM:

    • Start with a clear clinical need: What problem are you trying to solve? What are the current limitations of existing solutions?
    • Define the specific task for AI: What will the AI do? How will it improve patient care or outcomes? Will it analyze images, predict risks, assist with diagnosis, or personalize treatment?
    • Consider the target user: Who will use the device? What are their needs and expectations? Doctors, nurses, patients, or at-home users?

    2. DATA ACQUISITION AND PREPARATION :

    • Gather high-quality data: AI algorithms need vast amounts of data to learn and make accurate predictions. This data can come from various sources, such as:
      • Electronic health records
      • Clinical trials
      • Medical images
      • Sensor data
    • Ensure data quality: The data must be accurate, relevant, and representative of the target population.
    • Data preprocessing: Clean, normalize, and annotate the data to prepare it for AI training. This may involve removing errors, handling missing values, and labeling data for supervised learning.

    3. AI MODEL DEVELOPMENT AND VALIDATION:

    • Choose the right AI model: Select an appropriate AI model based on the specific task and data characteristics. This could include:
      • Machine learning algorithms (e.g., support vector machines, random forests)
      • Deep learning models (e.g., convolutional neural networks for image analysis, recurrent neural networks for time-series data)
      • Natural language processing techniques (for text analysis)
    • Train and validate the AI model: Train the AI model on the prepared data and validate its performance on a separate dataset. This helps ensure the model generalizes well to new, unseen data.
    • Optimize the AI model: Fine-tune the model to achieve the desired accuracy, sensitivity, specificity, and performance. This may involve adjusting hyperparameters, trying different architectures, or using techniques like transfer learning.

    4. DEVICE  DESIGN AND DEVELOPMENT :

    • Integrate the AI model into the device: This may involve embedding the AI model on the device itself (edge AI) or using a cloud-based approach where the AI processing happens on a remote server.
    • Design the user interface: Create a user-friendly interface that allows users to interact with the device and interpret the AI’s output. Consider factors like ease of use, accessibility, and clear presentation of results.
    • Develop the hardware and software: Build the physical device and develop the software that will run the AI model and user interface. This involves selecting appropriate sensors, microcontrollers, and communication protocols.

    5. REGULATORY  COMPLIANCE  AND APPROVAL :

    • Meet regulatory requirements: Medical devices must meet stringent regulatory requirements to ensure safety and effectiveness. This includes complying with standards such as:
      • ISO 13485 (quality management system)
      • IEC 62304 (medical device software)
      • GDPR (data privacy)
    • Obtain regulatory approval: Obtain regulatory approval from agencies like the FDA (in the US) or obtain the CE marking (in Europe) before marketing the device.
    • Clinical validation: Conduct clinical trials to demonstrate the safety and effectiveness of the AI-powered medical device in a real-world setting.

    6. DEPLOYMENT AND MONITORING:

    • Deploy the device: Make the device available to healthcare providers and patients. This may involve manufacturing, distribution, and training.
    • Monitor performance: Continuously monitor the device’s performance and collect feedback from users to identify areas for improvement. This helps ensure the AI model remains accurate and effective over time.

    KEY CONSIDERATIONS:

    • Explainability and transparency: It’s important to understand how the AI model makes decisions and to be able to explain its output to users, especially in healthcare where trust and transparency are crucial.
    • Data privacy and security: Protect patient data and ensure compliance with data privacy regulations like GDPR and HIPAA.
    • Ethical considerations: Address ethical concerns related to AI, such as bias, fairness, and accountability. Ensure the AI model is not biased against certain patient groups and that its decisions are explainable and justifiable.

    Creating a medical device with AI built in is a challenging but transformative process. By following these steps and considering the key considerations, you can develop innovative solutions that improve patient care and advance the field of medicine.


  • A DEVICE AI BUILT IN IS COMPOSED OF WHAT

    A DEVICE AI BUILT IN IS COMPOSED OF WHAT

    A DEVICE AI BUILT IN IS COMPOSED OF WHAT ?

    STETHOSCOPE WITH AI
    STETHOSCOPE WITH AI

    A device with AI built in is a fascinating blend of technology! Here’s a breakdown of the key components that make it tick:

    1. HARDWARE:

    • Processing Power:
      • Microcontrollers: Small, low-power processors for basic AI tasks in compact devices. (e.g., ARM Cortex-M series)  
      • Microprocessors: More powerful for complex AI, like image recognition or natural language processing. (e.g., Qualcomm Snapdragon, Intel Core)  
      • AI Accelerators: Specialized hardware designed to speed up AI computations. (e.g., Google’s Edge TPU, NVIDIA’s Jetson Nano)  
    • Sensors: To gather data from the real world, which the AI can then analyze.
      • Cameras: For image and video input (e.g., in a smart security camera or a medical imaging device)  
      • Microphones: For audio input (e.g., in a voice assistant or a hearing aid)  
      • Environmental sensors: To measure temperature, humidity, pressure, etc. (e.g., in a smart thermostat or a weather station)
      • Biometric sensors: To measure heart rate, blood oxygen levels, etc. (e.g., in a smartwatch or a fitness tracker)


    • Memory: To store the AI models and the data being processed.
      • RAM: For temporary storage of data being actively used by the AI.  
      • Flash Memory: For long-term storage of the AI models and other software.


    • Connectivity: To communicate with other devices or the cloud.
      • Wi-Fi: For internet access and data transfer.
      • Bluetooth: For short-range communication with smartphones or other devices.  
      • Cellular: For mobile network connectivity.

    2. SOFTWARE:

    • Operating System (OS): Manages the device’s hardware and software resources.
      • Embedded OS: Lightweight operating systems for resource-constrained devices (e.g., FreeRTOS, Zephyr)  
      • Full-fledged OS: Like Android or Linux, for more complex devices with rich user interfaces.


    • AI Framework: Software libraries and tools that facilitate AI development and deployment.
      • TensorFlow Lite: A lightweight version of TensorFlow for mobile and embedded devices.  
      • PyTorch Mobile: A mobile version of PyTorch for deploying AI models on iOS and Android.  


    • AI Model: The “brain” of the AI system, trained to perform a specific task.
      • Machine Learning Models: Trained on large datasets to recognize patterns and make predictions.  
      • Deep Learning Models: More complex models with multiple layers, capable of handling more sophisticated tasks.  


    3. KEY CONSIDERATIONS:

    • Power Efficiency: Especially crucial for battery-powered devices.
    • Real-time Processing: For applications that require immediate responses (e.g., autonomous driving).  
    • Security: Protecting sensitive data and preventing unauthorized access.  
    • User Experience: Designing an intuitive and user-friendly interface.  

    By combining these hardware and software components, devices with AI built in can perform tasks that traditionally required human intelligence, making them more autonomous, intelligent, and helpful in various applications.  


  • STETHOSCOPE AI BUILT IN


    STETHOSCOPE AI BUILT IN


    STETHOSCOPE WITH AI
    STETHOSCOPE WITH AI

    Interested in the cutting edge of stethoscope technology ? AI is transforming this classic medical tool, making it more powerful than ever. Here are some leading examples of stethoscopes with built-in AI:

    1. EKO DIGITAL STETHOSCOPES

    • AI for Heart & Lung Sounds: Eko offers a range of digital stethoscopes that use AI to analyze heart and lung sounds, aiding in the detection of conditions like heart murmurs, atrial fibrillation, and wheezing.
    • FDA-Cleared Algorithms: Their AI algorithms have received FDA clearance for detecting certain heart conditions.
    • Amplified Auscultation: These stethoscopes amplify sounds, making it easier to hear subtle abnormalities.
    • Wireless Connectivity: Connect to smartphones and tablets for visualization, recording, and sharing of auscultation data.
    • Examples: Eko DUO ECG + Digital Stethoscope, Eko CORE Digital Attachment

    2. SMARTSOUND SKEEPER SERIES

    • AI-Powered Auscultation: This series features AI algorithms to analyze heart and lung sounds, providing real-time feedback and diagnostic assistance.
    • Multiple Models: Offers different models (R1, H1, P1) designed for various use cases, including remote patient monitoring and home care.
    • Wearable Option: The P1 model is a wearable patch for continuous monitoring of heart and lung sounds.

    3. THINKLABS ONE DIGITAL STETHOSCOPE

    • Focus on Sound Quality: Known for its exceptional sound quality and noise cancellation.
    • AI Integration: While not built-in, it can integrate with third-party AI platforms for analysis of recorded auscultations.

    Key Benefits of AI Stethoscopes:

    • Improved Accuracy: AI can help detect subtle sounds that may be missed by the human ear.
    • Early Detection: AI algorithms can identify early signs of disease, leading to faster diagnosis and treatment.
    • Remote Monitoring: AI-powered stethoscopes can be used for remote patient monitoring, improving access to care.
    • Enhanced Learning: These tools can be valuable for medical education and training.

    IMPORTANT CONSIDERATIONS:

    • Clinical Validation: Look for stethoscopes with AI algorithms that have been clinically validated for accuracy.
    • Data Privacy: Ensure patient data is handled securely and confidentially.
    • Integration with Existing Systems: Consider how the stethoscope integrates with your existing electronic health record (EHR) or telemedicine platform.

    AI stethoscopes are revolutionizing the way healthcare professionals listen to heart and lung sounds. By combining advanced technology with clinical expertise, these tools can improve patient care and outcomes.


  • ECG  WITH  AI

    ECG  WITH  AI


    AI is transforming the field of electrocardiography (ECG), offering significant improvements in the accuracy, efficiency, and accessibility of heart health diagnostics. Here’s how AI is being used to enhance ECG technology:

    1. AUTOMATED ECG INTERPRETATION:

    • Rapid analysis: AI algorithms can analyze ECG data in seconds, providing quick and accurate interpretations of heart rhythms, including the detection of arrhythmias, ischemia, and other cardiac abnormalities.
    • Improved accuracy: AI can detect subtle patterns in ECG signals that may be missed by the human eye, leading to more accurate diagnoses.
    • Reduced workload: By automating the initial interpretation of ECGs, AI can reduce the workload of healthcare professionals, allowing them to focus on more complex cases.

    2. RISK STRATIFICATION AND PREDICTION:

    • Personalized risk assessment: AI can analyze ECG data along with other patient information, such as medical history and lifestyle factors, to assess the risk of future cardiovascular events.
    • Early detection: AI can identify subtle changes in ECG patterns that may indicate early signs of heart disease, enabling proactive intervention.
    • Predictive analytics: AI can predict the likelihood of specific cardiac events, such as heart attacks or strokes, helping healthcare providers make informed treatment decisions.

    3. REMOTE MONITORING AND TELEHEALTH:

    • Continuous monitoring: AI-powered ECG devices can continuously monitor patients’ heart rhythms, providing real-time data for early detection of abnormalities.
    • Remote diagnosis: AI can enable remote diagnosis of heart conditions, allowing patients to receive care from anywhere in the world.
    • Telehealth applications: AI-powered ECG analysis can be integrated into telehealth platforms, facilitating remote consultations and improving access to care.

    EXAMPLES OF AI-POWERED ECG SOLUTIONS:

    • Cardiomatics: This platform uses AI to analyze ECGs, providing automated interpretations and risk assessments for various heart conditions.

    Cardiomatics ECG analysis platform     

    CARDIOMATICS
    CARDIOMATICS


    • ALIVECOR KARDIAMOBILE 6L:
    KardiaMobile® 6L
    KardiaMobile® 6L
    •     portable ECG device uses AI to detect a wide range of arrhythmias, including atrial fibrillation, bradycardia, and tachycardia

    AliveCor KardiaMobile 6L ECG device

    • Anumana: This AI platform analyzes ECGs to detect heart failure and other cardiac conditions with high accuracy.

    Benefits of AI in ECG:

    • Improved accuracy: AI can enhance the accuracy of ECG interpretation, leading to better diagnosis and treatment decisions.
    • Increased efficiency: AI can automate ECG analysis, saving time and resources for healthcare professionals.
    • Enhanced accessibility: AI-powered ECG devices can be used in remote settings and integrated into telehealth platforms, improving access to care.
    • Early detection: AI can identify early signs of heart disease, enabling timely intervention and preventing serious complications.
    • Personalized care: AI can provide personalized risk assessments and treatment recommendations, improving patient outcomes.

    The Future of AI in ECG:

    AI is poised to revolutionize ECG technology in the years to come. We can expect to see:

    • More sophisticated AI algorithms: AI will continue to improve in its ability to detect subtle ECG abnormalities and predict future cardiac events.
    • Increased integration: AI will be integrated into more ECG devices and healthcare systems, making it a standard part of cardiac care.
    • Wearable ECG devices: AI-powered wearable devices will enable continuous monitoring of heart health, providing valuable data for early detection and prevention of heart disease.

    By embracing AI, the field of electrocardiography can continue to advance, providing more accurate, efficient, and accessible heart health diagnostics for patients worldwide.

  • WHAT PORT IS NEEDED TO CONNECT A DEVICE TO THE CLOUD

    WHAT PORT IS NEEDED TO CONNECT A DEVICE TO THE CLOUD

    ETHERNET (PORT 80 AND 443)
    ETHERNET (PORT 80 AND 443)

     It depends on how the device connects to the internet. Here are the most common ports used for connecting devices to the cloud:

    1. ETHERNET (PORT 80 AND 443)

    • How it works: This is a wired connection, like the one you use for your computer. The device needs an Ethernet port to plug into a network cable, which is then connected to a router or modem that provides internet access.
    • Ports:
      • Port 80: Used for HTTP (Hypertext Transfer Protocol), the standard protocol for web traffic.
      • Port 443: Used for HTTPS (HTTP Secure), the secure version of HTTP that encrypts data for safe transmission.
    • Common in: Medical devices in hospitals, clinics, or labs where a reliable wired connection is preferred.

    2. WI-FI (PORTS VARY)

    • How it works: The device uses a Wi-Fi module to connect wirelessly to a Wi-Fi network, which provides internet access.
    • Ports: Wi-Fi uses a range of ports, but the most common ones are:
      • Port 80 and 443: For HTTP and HTTPS, as mentioned above.
      • Ports in the 49152 to 65535 range: Often used for dynamic and private ports for specific applications.
    • Common in: Portable medical devices, home healthcare devices, and wearables.

    3. CELLULAR ( PORTS VARY )

    • How it works: The device uses a cellular module (like the one in your smartphone) to connect to a cellular network for internet access.
    • Ports: Cellular communication uses a variety of ports, and the specific ports used can depend on the cellular network and the device.
    • Common in: Remote patient monitoring devices, medical alert systems, and devices used in areas without Wi-Fi or Ethernet access.

    IMPORTANT CONSIDERATIONS:

    • Security: Regardless of the port used, security is crucial, especially for medical devices handling sensitive patient data. Ensure the device and the cloud service use encryption and other security measures to protect data.
    • Firewall: Firewalls can sometimes block specific ports. If you’re having trouble connecting a device, you might need to configure your firewall to allow traffic on the relevant ports.
    • Device Configuration: The device itself needs to be configured to use the correct port and network settings to connect to the cloud.

    If you can tell  more about the specific device you want to connect, we might be able to provide more specific information about the ports it uses.


  • LIST OF PORTS ON MEDICAL DEVICE

    LIST OF PORTS ON MEDICAL DEVICE

    You’re right to be curious about the ports on medical devices! They are essential for connectivity, data transfer, and various functionalities. Here’s a breakdown of common ports you might find on medical devices:

    1. DATA TRANSFER AND COMMUNICATION

    • USB (Universal Serial Bus): Extremely common for connecting to computers, peripherals, and charging. It comes in various types (USB-A, USB-B, USB-C, Mini-USB, Micro-USB), each with different shapes and capabilities.
    • RS-232 (Serial Port): An older standard, still used for some devices for simple data communication.
    • Ethernet: For networking and connecting to hospital information systems (HIS) or local networks.

    2. DISPLAY  AND OUTPUT

    • VGA (Video Graphics Array): An older standard for connecting to external displays (monitors).
    • DVI (Digital Visual Interface): A digital video interface for higher-quality display connections.
    • HDMI (High-Definition Multimedia Interface): A modern standard for transmitting high-definition video and audio.
    • DisplayPort: Another digital display interface, often found on newer devices.

    3. AUDIO

    • 3.5mm Headphone Jack: The standard audio jack for headphones or speakers.

    4. SPECIALIZED MEDICAL PORTS

    • ECG/EKG Ports: For connecting electrocardiogram leads to monitor heart activity.
    • SpO2 Ports: For connecting pulse oximeter sensors to measure blood oxygen levels.
    • Blood Pressure Ports: For connecting blood pressure cuffs.
    • Temperature Probe Ports: For connecting temperature probes.

    5. OTHER PORTS

    • Power Connectors: For supplying power to the device. These can vary widely in shape and size.
    • DC Power Jack: A common type of power connector.

    WHY ARE THESE PORTS IMPORTANT?

    • Data Transfer: To transfer data between the medical device and a computer, another device, or a network. This is crucial for storing patient information, analyzing data, and updating software.
    • Connectivity: To connect to external devices like monitors, printers, or other medical equipment.
    • Charging: To charge the device’s battery.
    • Communication: To allow the device to communicate with other systems or devices.

    When looking at medical devices, understanding the types of ports they have can give you valuable insights into their capabilities, connectivity options, and potential for integration with other systems.


  • CONNECTIVITY OF THERMOSCAN PRO 6000

    CONNECTIVITY OF THERMOSCAN PRO 6000

    THERMOSCAN PRO 6000 DIGITAL VERSION
    THERMOSCAN PRO 6000 DIGITAL VERSION

    You’re interested in how the Braun ThermoScan PRO 6000 handles connectivity! While it’s a highly regarded thermometer, its connectivity options are somewhat limited compared to some newer smart thermometers on the market. Here’s a breakdown:

    PRIMARY CONNECTIVITY: IEXAMINER PLATFORM

    • Wired Connection: The PRO 6000 (specifically the digital version) connects to a computer or mobile device via a USB cable.
    • iExaminer Software: Welch Allyn provides the iExaminer platform, which allows you to:
      • Download temperature readings from the thermometer.
      • Store and manage the data.
      • View basic reports and graphs.
      • Potentially integrate with some electronic health record (EHR) systems.

    LIMITATIONS:

    • No Wireless Connectivity: The PRO 6000 does not have built-in Wi-Fi or Bluetooth, so it cannot directly connect to the internet or a cloud service.
    • Limited Data Transfer: The iExaminer platform primarily focuses on downloading and storing temperature readings. It doesn’t offer advanced features like real-time data streaming or integration with a wide range of health platforms.

    POTENTIAL WORKAROUNDS (AS MENTIONED BEFORE):

    • Third-Party Software: You might find other software applications that can import data from the iExaminer platform or directly from the thermometer, potentially offering more connectivity options.
    • Manual Data Entry: You could manually enter temperature readings into cloud-based health platforms or telehealth services.
    • Custom Solutions: With programming expertise, you could potentially develop a custom application to enhance connectivity.

    Key Takeaway:

    The ThermoScan PRO 6000’s connectivity is primarily focused on transferring data to a computer or mobile device via a wired connection for basic storage and analysis. It lacks direct cloud integration or wireless capabilities. However, with some effort and the right tools, you can explore workarounds to expand its connectivity options.


  • HOW TO CONNECT THE THERMOSCAN PRO 6000 TO THE CLOUD AND AI

    HOW TO CONNECT THE THERMOSCAN PRO 6000 TO THE CLOUD AND AI: THE COMPLETE PROFESSIONAL GUIDE

    Braun ThermoScan Pro 6000 Ear Thermometer

    Introduction: Transforming Traditional Medical Devices into Smart Healthcare Solutions

    In the rapidly evolving landscape of digital healthcare, the integration of traditional medical devices with cloud computing and artificial intelligence represents one of the most significant technological advances of our time. The Braun ThermoScan Pro 6000, a trusted and widely-used ear thermometer in professional medical settings, stands as an exemplary candidate for this digital transformation. This comprehensive guide will walk you through the complete process of connecting this reliable medical device to cloud infrastructure and AI-powered systems, enabling unprecedented capabilities in patient monitoring, data analytics, and predictive healthcare.

    The ThermoScan Pro 6000 has established itself as a gold standard in clinical temperature measurement, offering accuracy, reliability, and ease of use. However, in its traditional configuration, each temperature reading remains isolated—recorded manually or stored temporarily in device memory. By connecting this device to the cloud and integrating AI capabilities, healthcare providers can unlock transformative benefits: real-time data synchronization, automated patient record updates, trend analysis, early warning systems for potential health issues, and seamless integration with electronic health record (EHR) systems.

    This transformation is not merely about technological advancement; it represents a fundamental shift in how we approach patient care, moving from reactive medicine to proactive, data-driven healthcare that can predict and prevent complications before they become critical.

    Understanding the Braun ThermoScan Pro 6000: Technical Foundation

    Device Specifications and Capabilities

    Braun ThermoScan Pro 6000 with Cradle

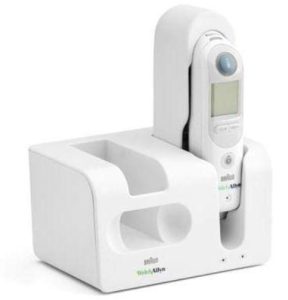
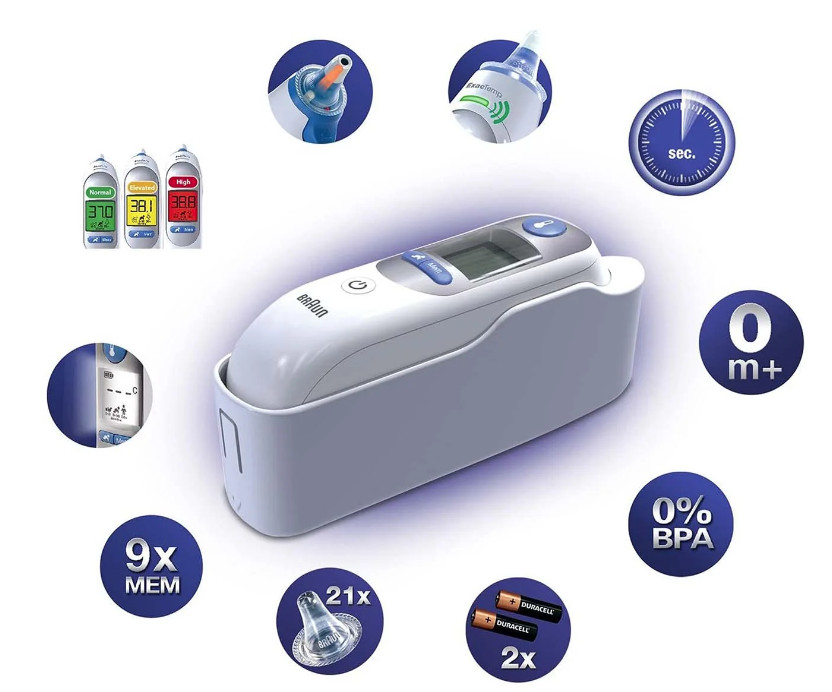
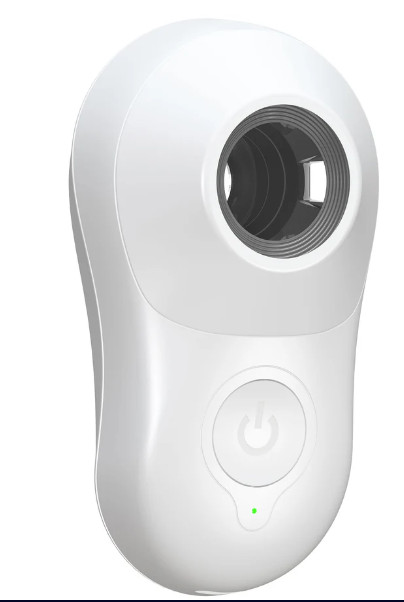
    The Braun ThermoScan Pro 6000, manufactured under the Welch Allyn brand, represents the pinnacle of infrared ear thermometry technology. Understanding its technical capabilities is essential before embarking on cloud integration:

    Core Technical Specifications:

    • Measurement Technology: Infrared tympanic thermometry
    • Measurement Range: 34.0°C to 42.2°C (93.2°F to 108.0°F)
    • Accuracy: ±0.2°C (±0.4°F) in the range 35.5°C to 42.0°C
    • Measurement Time: Approximately 1-2 seconds
    • Memory Capacity: Stores last temperature reading
    • Display: Large LCD with backlight for easy reading
    • Power Source: Rechargeable lithium-ion battery
    • Cradle Interface: Proprietary charging and data transfer dock

    Professional-Grade Features:

    • Probe Covers: Disposable lens filters ensure hygiene between patients
    • ExacTemp Technology: Audible and visual confirmation when positioned correctly
    • Celsius/Fahrenheit Toggle: Adaptable to different regional standards
    • Silent Mode: Option for discrete temperature taking
    • Robust Construction: Designed for high-volume clinical use

    The Connectivity Challenge

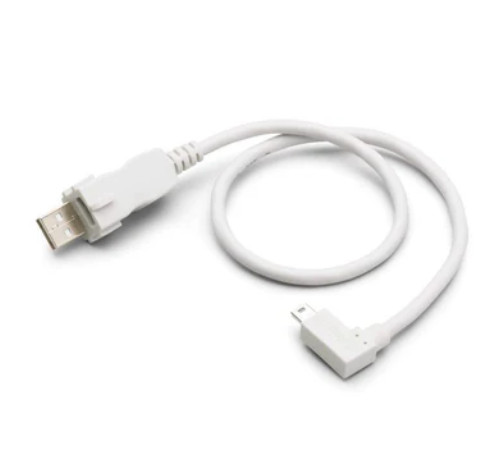
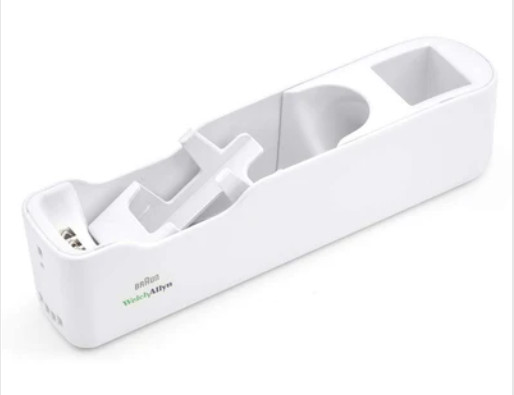
    The ThermoScan Pro 6000 was originally designed as a standalone device, lacking native wireless connectivity features such as WiFi, Bluetooth, or cellular capabilities. The device communicates with its charging cradle through proprietary contact points that transfer power and, potentially, data. This presents both a challenge and an opportunity:

    The Challenge: No built-in network interface means direct internet connectivity is impossible without hardware modification or intermediary solutions.

    The Opportunity: The cradle’s data interface provides a legitimate access point for extracting temperature readings without compromising the device’s medical certification or warranty.

    This architectural limitation requires us to implement what is known as an “IoT gateway solution”—an intermediary device that bridges the gap between the ThermoScan Pro 6000 and cloud infrastructure.

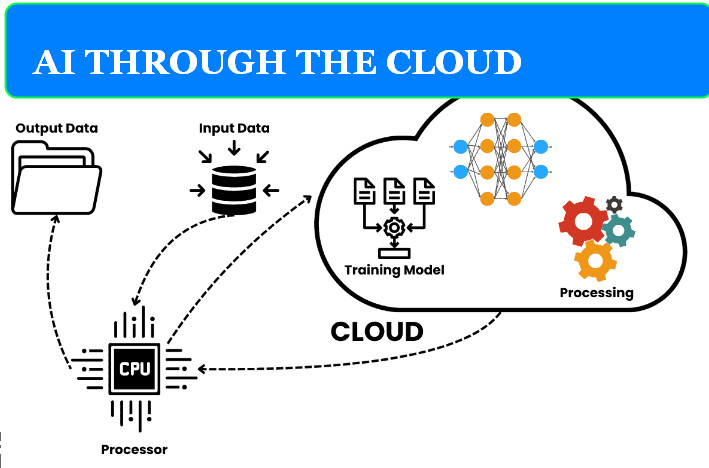
    The Cloud and AI Integration Architecture

    Conceptual Framework

    IoT Healthcare Architecture

    Before diving into implementation details, it’s crucial to understand the overall architecture of a cloud-connected medical device ecosystem. The integration consists of several interconnected layers:

    1. Device Layer (Physical)

    • The ThermoScan Pro 6000 itself
    • Proprietary charging/data cradle
    • Interface adapter or gateway hardware

    2. Edge Computing Layer

    • IoT gateway device
    • Local data processing
    • Protocol conversion
    • Initial data validation
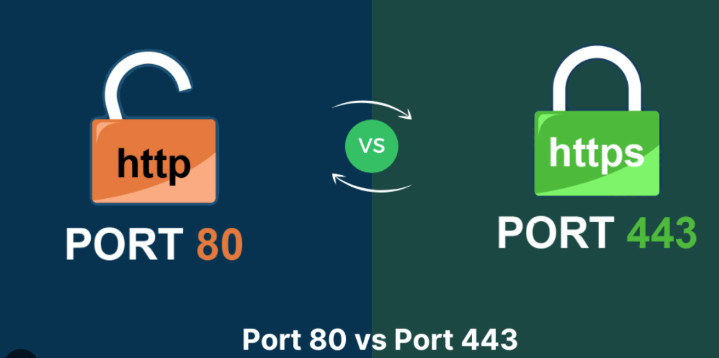
    3. Network Layer

    • Secure communication protocols (HTTPS, MQTT, WebSocket)
    • Encryption mechanisms (TLS/SSL)
    • Authentication systems
    • Network redundancy

    4. Cloud Infrastructure Layer

    • Cloud storage (databases)
    • Application servers
    • API endpoints
    • Load balancers

    5. AI/Analytics Layer

    • Machine learning models
    • Predictive analytics engines
    • Pattern recognition algorithms
    • Anomaly detection systems

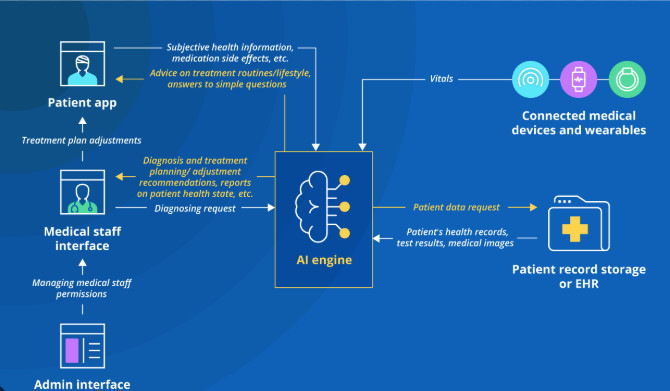
    6. Application Layer

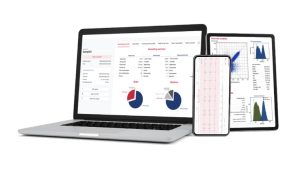
    • Web-based dashboards
    • Mobile applications
    • EHR integration interfaces
    • Alert and notification systems

    Each layer serves a specific purpose and must be carefully designed to ensure reliability, security, and compliance with healthcare regulations such as HIPAA (Health Insurance Portability and Accountability Act) in the United States or GDPR (General Data Protection Regulation) in Europe.

    Step-by-Step Implementation Guide

    Phase 1: Hardware Interface Development

    Medical Device Cloud Connection

    Step 1.1: Cradle Analysis and Reverse Engineering

    The first critical step involves understanding how the ThermoScan Pro 6000 communicates with its cradle. This requires:

    Physical Examination:

    • Identify the contact points on both the thermometer and cradle
    • Determine the pinout configuration (power, ground, data lines)
    • Measure voltage levels during charging and data transfer
    • Document the physical connector specifications

    Protocol Investigation:

    • Use a logic analyzer to capture communication between device and cradle
    • Identify the communication protocol (likely UART, SPI, or I2C)
    • Determine baud rate and data format
    • Decode the data packets to understand the message structure

    Safety Considerations:

    • Ensure any modifications maintain electrical isolation for patient safety
    • Verify that voltage levels remain within safe ranges
    • Implement overcurrent and overvoltage protection
    • Consider using optoisolators for electrical safety

    Step 1.2: Building the IoT Gateway

    Once you understand the communication protocol, the next step is building an IoT gateway that can:

    Hardware Components Required:

    • Microcontroller or single-board computer (Raspberry Pi, Arduino, ESP32)
    • Interface circuitry matching the cradle’s electrical specifications
    • WiFi or cellular module for internet connectivity
    • Power supply with appropriate voltage regulation
    • Enclosure meeting medical device standards

    Recommended Platform: Raspberry Pi 4 Configuration

    The Raspberry Pi 4 offers an excellent balance of processing power, connectivity options, and development support:

    Hardware Setup:
    - Raspberry Pi 4 Model B (4GB RAM minimum)
    - USB-to-Serial adapter (if cradle uses UART)
    - or GPIO pins configured for the appropriate protocol
    - WiFi or Ethernet connection for internet access
    - SD card (32GB minimum) with Raspberry Pi OS
    - 5V 3A power supply
    - Custom interface board (PCB designed to match cradle connector)
    

    Step 1.3: Interface Board Design

    Creating a custom interface board ensures reliable, safe connection:

    Circuit Design Requirements:

    • Input protection (TVS diodes, fuses)
    • Level shifters (if voltage translation needed)
    • Optical isolation for patient safety
    • LED indicators for status monitoring
    • Test points for debugging
    • Proper PCB layout with adequate creepage and clearance

    Step 1.4: Firmware Development

    The gateway firmware serves as the bridge between the ThermoScan Pro 6000 and the cloud:

    # Pseudocode for Gateway Firmware
    import serial
    import time
    import json
    import requests
    from datetime import datetime
    
    class ThermoScanGateway:
        def __init__(self, serial_port, cloud_endpoint):
            self.serial = serial.Serial(serial_port, baudrate=9600)
            self.cloud_endpoint = cloud_endpoint
            self.device_id = "THERMOSCAN_001"
            
        def read_temperature(self):
            """Read temperature from ThermoScan Pro 6000"""
            # Wait for data from thermometer
            if self.serial.in_waiting > 0:
                raw_data = self.serial.read(self.serial.in_waiting)
                # Parse the data according to protocol
                temperature = self.parse_temperature(raw_data)
                return temperature
            return None
        
        def parse_temperature(self, raw_data):
            """Parse raw data into temperature reading"""
            # Implementation depends on actual protocol
            # This is a placeholder
            temp_bytes = raw_data[2:4]  # Example
            temperature = int.from_bytes(temp_bytes, 'big') / 10.0
            return temperature
        
        def send_to_cloud(self, temperature):
            """Send temperature data to cloud"""
            data = {
                'device_id': self.device_id,
                'timestamp': datetime.utcnow().isoformat(),
                'temperature': temperature,
                'unit': 'celsius',
                'device_type': 'ThermoScan_Pro_6000'
            }
            
            try:
                response = requests.post(
                    self.cloud_endpoint,
                    json=data,
                    headers={'Content-Type': 'application/json'},
                    timeout=10
                )
                return response.status_code == 200
            except Exception as e:
                print(f"Error sending to cloud: {e}")
                return False
        
        def run(self):
            """Main loop"""
            print("ThermoScan Gateway Started")
            while True:
                temp = self.read_temperature()
                if temp:
                    print(f"Temperature reading: {temp}°C")
                    if self.send_to_cloud(temp):
                        print("Data sent to cloud successfully")
                    else:
                        print("Failed to send data to cloud")
                time.sleep(0.1)
    
    # Initialize and run gateway
    gateway = ThermoScanGateway('/dev/ttyUSB0', 'https://api.healthcare.cloud/temperature')
    gateway.run()
    

    Phase 2: Cloud Infrastructure Setup

    Cloud Connected Medical Devices

    Step 2.1: Choosing a Cloud Platform

    Several cloud platforms offer excellent healthcare-focused infrastructure:

    Amazon Web Services (AWS):

    • AWS IoT Core: Managed IoT service for device connectivity
    • Amazon HealthLake: HIPAA-eligible data storage
    • AWS Lambda: Serverless computing for data processing
    • Amazon SageMaker: AI/ML model development and deployment
    • Advantages: Comprehensive healthcare compliance, extensive documentation
    • Considerations: Cost can escalate with high data volumes

    Microsoft Azure:

    • Azure IoT Hub: Device connectivity and management
    • Azure Health Data Services: FHIR-compliant data storage
    • Azure Functions: Event-driven serverless compute
    • Azure Machine Learning: Enterprise ML platform
    • Advantages: Strong enterprise integration, excellent healthcare partnerships
    • Considerations: Learning curve for Azure-specific services

    Google Cloud Platform (GCP):

    • Cloud IoT Core: (Note: Being deprecated, alternative paths needed)
    • Cloud Healthcare API: HIPAA-compliant healthcare data management
    • Cloud Functions: Serverless execution environment
    • Vertex AI: Unified ML platform
    • Advantages: Superior AI/ML capabilities, competitive pricing
    • Considerations: IoT Core deprecation requires alternative connectivity solutions

    Step 2.2: Setting Up AWS IoT Core (Detailed Example)

    Let’s walk through a complete AWS setup:

    2.2.1: Create an IoT Thing

    # Using AWS CLI
    aws iot create-thing --thing-name ThermoScan_Pro_6000_001
    
    # Generate certificates
    aws iot create-keys-and-certificate \
        --set-as-active \
        --certificate-pem-outfile thermoscan_cert.pem \
        --public-key-outfile thermoscan_public.key \
        --private-key-outfile thermoscan_private.key
    

    2.2.2: Create and Attach IoT Policy

    {
      "Version": "2012-10-17",
      "Statement": [
        {
          "Effect": "Allow",
          "Action": [
            "iot:Connect"
          ],
          "Resource": [
            "arn:aws:iot:us-east-1:ACCOUNT_ID:client/ThermoScan_Pro_6000_001"
          ]
        },
        {
          "Effect": "Allow",
          "Action": [
            "iot:Publish"
          ],
          "Resource": [
            "arn:aws:iot:us-east-1:ACCOUNT_ID:topic/thermoscan/temperature"
          ]
        }
      ]
    }
    

    2.2.3: Configure IoT Rules for Data Processing

    {
      "sql": "SELECT device_id, timestamp, temperature, unit FROM 'thermoscan/temperature'",
      "actions": [
        {
          "dynamodb": {
            "tableName": "TemperatureReadings",
            "roleArn": "arn:aws:iam::ACCOUNT_ID:role/IoTDynamoDBRole",
            "hashKeyField": "device_id",
            "hashKeyValue": "${device_id}",
            "rangeKeyField": "timestamp",
            "rangeKeyValue": "${timestamp}",
            "payloadField": "payload"
          }
        },
        {
          "lambda": {
            "functionArn": "arn:aws:lambda:us-east-1:ACCOUNT_ID:function:ProcessTemperature"
          }
        }
      ]
    }
    

    Step 2.3: Database Design

    Proper database schema is crucial for efficient data storage and retrieval:

    DynamoDB Table Schema (NoSQL Approach):

    Table: TemperatureReadings
    Primary Key: 
      - Partition Key: device_id (String)
      - Sort Key: timestamp (String, ISO 8601 format)
      
    Attributes:
      - temperature (Number)
      - unit (String)
      - patient_id (String) [optional, if device-patient mapping exists]
      - location (String) [clinic/hospital location]
      - operator_id (String) [healthcare professional who took reading]
      - flags (List) [any anomalies or special conditions]
      
    Global Secondary Indexes:
      - patient_id-timestamp-index (for patient-centric queries)
      - location-timestamp-index (for location-based analytics)
    

    Relational Database Alternative (PostgreSQL):

    CREATE TABLE devices (
        device_id VARCHAR(50) PRIMARY KEY,
        device_model VARCHAR(100),
        serial_number VARCHAR(100),
        location VARCHAR(200),
        last_calibration TIMESTAMP,
        status VARCHAR(20)
    );
    
    CREATE TABLE temperature_readings (
        reading_id SERIAL PRIMARY KEY,
        device_id VARCHAR(50) REFERENCES devices(device_id),
        timestamp TIMESTAMP NOT NULL,
        temperature NUMERIC(4,2) NOT NULL,
        unit VARCHAR(10) NOT NULL,
        patient_id VARCHAR(50),
        operator_id VARCHAR(50),
        quality_indicator VARCHAR(20),
        notes TEXT,
        INDEX idx_device_timestamp (device_id, timestamp),
        INDEX idx_patient_timestamp (patient_id, timestamp)
    );
    
    CREATE TABLE patients (
        patient_id VARCHAR(50) PRIMARY KEY,
        first_name VARCHAR(100),
        last_name VARCHAR(100),
        date_of_birth DATE,
        medical_record_number VARCHAR(50)
    );
    

    Phase 3: Implementing AI-Powered Analytics

    IoT Healthcare Devices

    Step 3.1: Data Preparation and Feature Engineering

    AI models require carefully prepared data:

    Data Preprocessing Pipeline:

    import pandas as pd
    import numpy as np
    from datetime import datetime, timedelta
    from sklearn.preprocessing import StandardScaler
    
    class TemperatureDataPreprocessor:
        def __init__(self):
            self.scaler = StandardScaler()
            
        def load_data(self, start_date, end_date):
            """Load temperature data from database"""
            # Query database for temperature readings
            query = """
                SELECT 
                    device_id,
                    timestamp,
                    temperature,
                    patient_id,
                    operator_id
                FROM temperature_readings
                WHERE timestamp BETWEEN %s AND %s
                ORDER BY timestamp
            """
            # Execute query and return DataFrame
            df = pd.read_sql(query, connection, params=[start_date, end_date])
            return df
        
        def engineer_features(self, df):
            """Create features for ML models"""
            # Convert timestamp to datetime
            df['timestamp'] = pd.to_datetime(df['timestamp'])
            
            # Extract time-based features
            df['hour_of_day'] = df['timestamp'].dt.hour
            df['day_of_week'] = df['timestamp'].dt.dayofweek
            df['is_weekend'] = df['day_of_week'].isin([5, 6]).astype(int)
            
            # Patient-specific features (if patient_id available)
            df_patient = df.groupby('patient_id').agg({
                'temperature': ['mean', 'std', 'min', 'max', 'count']
            }).reset_index()
            df_patient.columns = ['patient_id', 'temp_mean', 'temp_std', 
                                 'temp_min', 'temp_max', 'reading_count']
            
            df = df.merge(df_patient, on='patient_id', how='left')
            
            # Calculate temperature trend (change from previous reading)
            df = df.sort_values(['patient_id', 'timestamp'])
            df['temp_change'] = df.groupby('patient_id')['temperature'].diff()
            df['temp_change_rate'] = df['temp_change'] / df.groupby('patient_id')['timestamp'].diff().dt.total_seconds()
            
            # Flag abnormal temperatures
            df['is_fever'] = (df['temperature'] >= 38.0).astype(int)
            df['is_hypothermia'] = (df['temperature'] <= 35.0).astype(int)
            
            return df
        
        def prepare_for_training(self, df, target_column):
            """Prepare data for ML model training"""
            feature_columns = [
                'temperature', 'hour_of_day', 'day_of_week', 'is_weekend',
                'temp_mean', 'temp_std', 'temp_change', 'temp_change_rate'
            ]
            
            X = df[feature_columns].fillna(0)
            y = df[target_column]
            
            X_scaled = self.scaler.fit_transform(X)
            
            return X_scaled, y
    

    Step 3.2: Building Predictive Models

    Several AI models can enhance the ThermoScan Pro 6000’s capabilities:

    Model 1: Fever Prediction Model

    Predicts likelihood of fever development in the next 24 hours based on temperature trends:

    from sklearn.ensemble import RandomForestClassifier, GradientBoostingClassifier
    from sklearn.model_selection import train_test_split, cross_val_score
    from sklearn.metrics import classification_report, roc_auc_score
    import joblib
    
    class FeverPredictionModel:
        def __init__(self):
            self.model = GradientBoostingClassifier(
                n_estimators=100,
                learning_rate=0.1,
                max_depth=5,
                random_state=42
            )
            
        def train(self, X, y):
            """Train the fever prediction model"""
            X_train, X_test, y_train, y_test = train_test_split(
                X, y, test_size=0.2, random_state=42, stratify=y
            )
            
            # Train model
            self.model.fit(X_train, y_train)
            
            # Evaluate
            y_pred = self.model.predict(X_test)
            y_pred_proba = self.model.predict_proba(X_test)[:, 1]
            
            print("Classification Report:")
            print(classification_report(y_test, y_pred))
            print(f"ROC-AUC Score: {roc_auc_score(y_test, y_pred_proba):.4f}")
            
            # Cross-validation
            cv_scores = cross_val_score(self.model, X, y, cv=5, scoring='roc_auc')
            print(f"Cross-validation ROC-AUC: {cv_scores.mean():.4f} (+/- {cv_scores.std():.4f})")
            
            return self.model
        
        def predict(self, X):
            """Predict fever probability"""
            probabilities = self.model.predict_proba(X)[:, 1]
            return probabilities
        
        def get_feature_importance(self):
            """Return feature importance for interpretability"""
            return self.model.feature_importances_
        
        def save_model(self, filepath):
            """Save trained model"""
            joblib.dump(self.model, filepath)
        
        @classmethod
        def load_model(cls, filepath):
            """Load trained model"""
            instance = cls()
            instance.model = joblib.load(filepath)
            return instance
    

    Model 2: Anomaly Detection System

    Identifies unusual temperature patterns that may indicate device malfunction or critical health events:

    from sklearn.ensemble import IsolationForest
    from sklearn.covariance import EllipticEnvelope
    import numpy as np
    
    class TemperatureAnomalyDetector:
        def __init__(self, contamination=0.1):
            self.isolation_forest = IsolationForest(
                contamination=contamination,
                random_state=42,
                n_estimators=100
            )
            self.elliptic_envelope = EllipticEnvelope(
                contamination=contamination,
                random_state=42
            )
            
        def train(self, X):
            """Train anomaly detection models"""
            self.isolation_forest.fit(X)
            self.elliptic_envelope.fit(X)
            
        def detect_anomalies(self, X):
            """Detect anomalies using ensemble approach"""
            # Predictions from both models (-1 = anomaly, 1 = normal)
            if_predictions = self.isolation_forest.predict(X)
            ee_predictions = self.elliptic_envelope.predict(X)
            
            # Anomaly scores
            if_scores = self.isolation_forest.score_samples(X)
            
            # Consensus: flag as anomaly if both models agree
            consensus_anomalies = (if_predictions == -1) & (ee_predictions == -1)
            
            return {
                'is_anomaly': consensus_anomalies,
                'anomaly_score': if_scores,
                'isolation_forest_prediction': if_predictions,
                'elliptic_envelope_prediction': ee_predictions
            }
        
        def get_anomaly_details(self, X, indices):
            """Get detailed information about specific anomalies"""
            anomaly_data = X[indices]
            scores = self.isolation_forest.score_samples(anomaly_data)
            
            return pd.DataFrame({
                'anomaly_score': scores,
                'severity': np.where(scores < -0.5, 'High', 
                            np.where(scores < -0.3, 'Medium', 'Low'))
            })
    

    Model 3: Patient Health Trajectory Prediction

    Uses time series analysis to predict patient temperature trajectories:

    from tensorflow.keras.models import Sequential
    from tensorflow.keras.layers import LSTM, Dense, Dropout
    from tensorflow.keras.optimizers import Adam
    import numpy as np
    
    class TemperatureTrajectoryPredictor:
        def __init__(self, sequence_length=24):
            self.sequence_length = sequence_length
            self.model = None
            
        def create_sequences(self, data, target):
            """Create sequences for LSTM input"""
            X, y = [], []
            for i in range(len(data) - self.sequence_length):
                X.append(data[i:i + self.sequence_length])
                y.append(target[i + self.sequence_length])
            return np.array(X), np.array(y)
        
        def build_model(self, input_shape):
            """Build LSTM model for temperature prediction"""
            model = Sequential([
                LSTM(64, return_sequences=True, input_shape=input_shape),
                Dropout(0.2),
                LSTM(32, return_sequences=False),
                Dropout(0.2),
                Dense(16, activation='relu'),
                Dense(1, activation='linear')
            ])
            
            model.compile(
                optimizer=Adam(learning_rate=0.001),
                loss='mse',
                metrics=['mae']
            )
            
            self.model = model
            return model
        
        def train(self, X, y, epochs=50, batch_size=32, validation_split=0.2):
            """Train the LSTM model"""
            history = self.model.fit(
                X, y,
                epochs=epochs,
                batch_size=batch_size,
                validation_split=validation_split,
                verbose=1
            )
            return history
        
        def predict(self, X, steps_ahead=6):
            """Predict future temperature readings"""
            predictions = []
            current_sequence = X.copy()
            
            for _ in range(steps_ahead):
                pred = self.model.predict(current_sequence.reshape(1, -1, current_sequence.shape[-1]))
                predictions.append(pred[0, 0])
                
                # Update sequence for next prediction
                current_sequence = np.roll(current_sequence, -1, axis=0)
                current_sequence[-1] = pred
            
            return np.array(predictions)
    

    Phase 4: Building the User Interface and Dashboard

    IoT Healthcare Examples

    Step 4.1: Web Dashboard Design

    A professional dashboard provides healthcare workers with actionable insights:

    Dashboard Components:

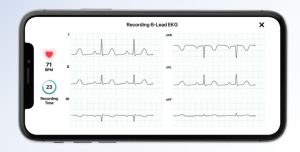
    1. Real-Time Temperature Monitor

      • Live feed of temperature readings
      • Device status indicators
      • Last reading timestamp
      • Battery level and calibration status
    2. Patient Temperature Trends

      • Line charts showing temperature over time
      • Normal range indicators
      • Fever and hypothermia thresholds
      • Comparative analysis with patient baseline
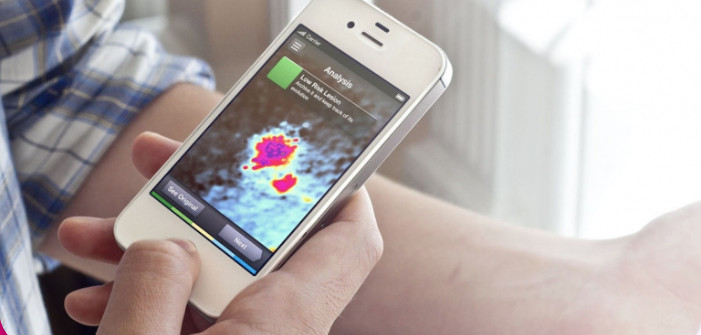
    3. AI Insights Panel

      • Fever risk predictions
      • Anomaly alerts
      • Recommended actions
      • Confidence scores
    4. Alert Management

      • Critical temperature alerts
      • Device malfunction warnings
      • Maintenance notifications
      • Calibration reminders
    5. Analytics and Reports

      • Summary statistics
      • Patient population trends
      • Device utilization metrics
      • Compliance tracking

    Step 4.2: Frontend Implementation (React Example)

    import React, { useState, useEffect } from 'react';
    import { LineChart, Line, XAxis, YAxis, CartesianGrid, Tooltip, Legend } from 'recharts';
    import axios from 'axios';
    
    const ThermoScanDashboard = () => {
      const [temperatureData, setTemperatureData] = useState([]);
      const [currentReading, setCurrentReading] = useState(null);
      const [aiPrediction, setAiPrediction] = useState(null);
      const [alerts, setAlerts] = useState([]);
    
      useEffect(() => {
        // Fetch real-time data
        const fetchData = async () => {
          try {
            const response = await axios.get('https://api.healthcare.cloud/temperature/live');
            setTemperatureData(response.data.history);
            setCurrentReading(response.data.current);
            setAiPrediction(response.data.ai_prediction);
          } catch (error) {
            console.error('Error fetching data:', error);
          }
        };
    
        // Initial fetch
        fetchData();
    
        // Set up real-time updates via WebSocket
        const ws = new WebSocket('wss://api.healthcare.cloud/ws/temperature');
        
        ws.onmessage = (event) => {
          const data = JSON.parse(event.data);
          
          if (data.type === 'new_reading') {
            setCurrentReading(data.reading);
            setTemperatureData(prev => [...prev.slice(-50), data.reading]);
          }
          
          if (data.type === 'alert') {
            setAlerts(prev => [data.alert, ...prev]);
          }
          
          if (data.type === 'ai_prediction') {
            setAiPrediction(data.prediction);
          }
        };
    
        return () => ws.close();
      }, []);
    
      return (
        <div className="dashboard-container">
          <header className="dashboard-header">
            <h1>ThermoScan Pro 6000 - AI-Powered Monitoring</h1>
          </header>
    
          <div className="dashboard-grid">
            {/* Current Reading Card */}
            <div className="card current-reading">
              <h2>Current Reading</h2>
              {currentReading && (
                <div className="reading-display">
                  <span className="temperature">{currentReading.temperature}°C</span>
                  <span className="timestamp">{new Date(currentReading.timestamp).toLocaleString()}</span>
                  <div className={`status ${currentReading.temperature > 38 ? 'fever' : 'normal'}`}>
                    {currentReading.temperature > 38 ? 'FEVER DETECTED' : 'NORMAL'}
                  </div>
                </div>
              )}
            </div>
    
            {/* AI Prediction Card */}
            <div className="card ai-prediction">
              <h2>AI Health Prediction</h2>
              {aiPrediction && (
                <div className="prediction-content">
                  <div className="risk-meter">
                    <span>Fever Risk (24h): </span>
                    <div className="progress-bar">
                      <div 
                        className="progress-fill" 
                        style={{width: `${aiPrediction.fever_probability * 100}%`}}
                      />
                    </div>
                    <span>{(aiPrediction.fever_probability * 100).toFixed(1)}%</span>
                  </div>
                  <div className="recommendations">
                    <h3>Recommendations:</h3>
                    <ul>
                      {aiPrediction.recommendations.map((rec, idx) => (
                        <li key={idx}>{rec}</li>
                      ))}
                    </ul>
                  </div>
                </div>
              )}
            </div>
    
            {/* Temperature Trend Chart */}
            <div className="card chart-container">
              <h2>Temperature Trend</h2>
              <LineChart width={800} height={300} data={temperatureData}>
                <CartesianGrid strokeDasharray="3 3" />
                <XAxis 
                  dataKey="timestamp" 
                  tickFormatter={(ts) => new Date(ts).toLocaleTimeString()}
                />
                <YAxis domain={[35, 42]} />
                <Tooltip />
                <Legend />
                <Line 
                  type="monotone" 
                  dataKey="temperature" 
                  stroke="#8884d8" 
                  strokeWidth={2}
                  dot={{ r: 3 }}
                />
                {/* Reference lines for normal range */}
                <Line 
                  y={38} 
                  stroke="red" 
                  strokeDasharray="5 5" 
                  strokeWidth={1}
                />
              </LineChart>
            </div>
    
            {/* Alerts Panel */}
            <div className="card alerts-panel">
              <h2>Recent Alerts</h2>
              <div className="alerts-list">
                {alerts.slice(0, 5).map((alert, idx) => (
                  <div key={idx} className={`alert alert-${alert.severity}`}>
                    <span className="alert-icon">⚠️</span>
                    <div className="alert-content">
                      <strong>{alert.title}</strong>
                      <p>{alert.message}</p>
                      <span className="alert-time">
                        {new Date(alert.timestamp).toLocaleString()}
                      </span>
                    </div>
                  </div>
                ))}
              </div>
            </div>
          </div>
        </div>
      );
    };
    
    export default ThermoScanDashboard;
    

    Phase 5: Security and Compliance

    Step 5.1: Implementing Security Best Practices

    Medical device security is paramount:

    Data Encryption:

    • End-to-end encryption for all data transmission
    • TLS 1.3 for network communications
    • AES-256 encryption for data at rest
    • Secure key management using AWS KMS or Azure Key Vault

    Authentication and Authorization:

    • Multi-factor authentication for dashboard access
    • Role-based access control (RBAC)
    • Device authentication using X.509 certificates
    • API authentication using OAuth 2.0 or JWT tokens

    Network Security:

    • Virtual Private Cloud (VPC) configuration
    • Firewall rules restricting access
    • DDoS protection
    • Intrusion detection systems

    Step 5.2: HIPAA Compliance Checklist

    • ✅ Business Associate Agreement (BAA) with cloud provider
    • ✅ Access controls and audit logs
    • ✅ Data encryption (in transit and at rest)
    • ✅ Automatic log-off for inactive sessions
    • ✅ Disaster recovery and backup procedures
    • ✅ Workforce training on security practices
    • ✅ Incident response plan
    • ✅ Regular security assessments

    Phase 6: Testing and Validation

    Step 6.1: Functional Testing

    import unittest
    import requests
    import time
    
    class ThermoScanIntegrationTest(unittest.TestCase):
        def setUp(self):
            self.base_url = 'https://api.healthcare.cloud'
            self.device_id = 'TEST_THERMOSCAN_001'
            
        def test_temperature_upload(self):
            """Test temperature data upload to cloud"""
            data = {
                'device_id': self.device_id,
                'timestamp': time.time(),
                'temperature': 37.5,
                'unit': 'celsius'
            }
            
            response = requests.post(
                f'{self.base_url}/temperature',
                json=data
            )
            
            self.assertEqual(response.status_code, 200)
            self.assertIn('success', response.json())
            
        def test_ai_prediction(self):
            """Test AI prediction endpoint"""
            response = requests.get(
                f'{self.base_url}/ai/predict/{self.device_id}'
            )
            
            self.assertEqual(response.status_code, 200)
            prediction = response.json()
            self.assertIn('fever_probability', prediction)
            self.assertIsInstance(prediction['fever_probability'], float)
            self.assertGreaterEqual(prediction['fever_probability'], 0)
            self.assertLessEqual(prediction['fever_probability'], 1)
    

    Conclusion: The Future of Connected Medical Devices

    The transformation of the Braun ThermoScan Pro 6000 from a standalone device to a cloud-connected, AI-powered medical instrument represents more than a technical achievement—it exemplifies the future of healthcare technology. This integration enables:

    Enhanced Patient Care:

    • Real-time monitoring and early intervention
    • Predictive analytics preventing complications
    • Automated record-keeping reducing human error
    • Data-driven clinical decision support

    Operational Efficiency:

    • Streamlined workflows for healthcare staff
    • Automated compliance reporting
    • Reduced administrative burden
    • Better resource allocation

    Research and Population Health:

    • Aggregated data for epidemiological studies
    • Pattern recognition across patient populations
    • Continuous device performance monitoring
    • Evidence-based protocol development

    As we move forward, the principles outlined in this guide can be applied to virtually any medical device, creating an interconnected ecosystem of smart healthcare tools that work together to improve patient outcomes and advance medical science.

    The journey from traditional medical device to AI-powered healthcare solution requires technical expertise, regulatory understanding, and commitment to patient safety—but the rewards in improved healthcare delivery make it an essential transformation for modern medical practice.

    MEDICAL  CLOUD AI IN USA

    APPLICATION TO CONNECT YOUR AUTOCLAVE TO YOUR PC

  • APPLICATIONS  FOR OTOSCOPE

    APPLICATIONS  FOR OTOSCOPE

    APPLICATIONS FOR TELEMEDECINE
    APPLICATIONS FOR TELEMEDECINE

    It seems you’re interested in applications for otoscopes! There are a few different ways to think about “applications” in this context. Let’s explore them:

    1.    SMARTPHONE  APP THAT WORK WITH DIGITAL OTOSCOPES

    These apps typically connect to a digital otoscope (one with a camera) via WiFi or USB.

    • Functionality:
      • Live View: See a live video feed from the otoscope camera on your smartphone screen.
      • Image/Video Capture: Take pictures and record videos of the ear canal and eardrum.
      • Storage and Sharing: Store the captured media on your phone or in the cloud, and easily share it with patients, colleagues, or specialists.
    • Examples:
      • Blueberry Pediatrics Otoscope: A popular app with a user-friendly interface for recording and sharing ear exams.
      • Otoscope Camera: Offers live view, image capture, and basic image editing tools.

    2. SOFTWARE APPLICATIONS  FOR MANAGING  AND ANALYZING  EAR IMAGES

    • These are more advanced applications, often used by healthcare professionals.
    • Functionality:
      • Image Management: Organize and store large numbers of ear images.
      • Image Analysis: Some software may include tools for measuring ear structures, comparing images over time, or even using AI to detect abnormalities.
      • Integration with Electronic Health Records (EHRs): Seamlessly integrate ear exam data with patient records.

    3. AI-POWERED APPLICATIONS FOR OTOSCOPE IMAGE  ANALYSIS

    This is a cutting-edge area with a lot of potential.

    • Functionality:
      • Automated Diagnosis: AI algorithms can analyze otoscope images to detect signs of ear infections, fluid buildup, and other conditions.
      • Decision Support: Provide healthcare professionals with information to help them make more accurate diagnoses and treatment decisions.
    • Examples:
      • While still under development, several companies are working on AI-powered otoscope applications. Keep an eye out for new developments in this field!

    4. TELEMEDICINE APPLICATIONS:

    • Digital otoscopes and related apps can be used for remote ear examinations.
    • Functionality:
      • Real-time Consultation: Patients can use a digital otoscope at home while consulting with a doctor remotely.
      • Remote Diagnosis: Healthcare providers can view the images and provide diagnoses or advice without the need for an in-person visit.


  • APPLICATIONS WITH AI FOR OTOSCOPE

    APPLICATIONS WITH AI FOR OTOSCOPE
    APPLICATIONS WITH AI FOR OTOSCOPE

    APPLICATIONS WITH AI FOR OTOSCOPE

    AI is bringing exciting new capabilities to otoscopes, transforming how we diagnose and manage ear conditions. Here are some key applications where AI is making a difference:

    1. AUTOMATED DIAGNOSIS:

    • Image analysis: AI algorithms can analyze images and videos of the ear canal and eardrum, identifying signs of infection, inflammation, fluid buildup, earwax impaction, and even certain types of tumors.
    • Diagnostic accuracy: AI can detect subtle features that may be missed by the human eye, leading to more accurate and timely diagnoses.
    • Decision support: AI can provide diagnostic support to healthcare professionals, especially in settings with limited access to specialists.

    2. PERSONALIZED TREATMENT RECOMMENDATIONS:

    • Treatment planning: Based on the AI’s analysis, the system can suggest appropriate treatment options, such as antibiotics for ear infections or earwax removal procedures.
    • Monitoring: AI can track the progression of ear conditions over time, helping to assess the effectiveness of treatment and adjust plans as needed.

    3. REMOTE EAR CARE:

    • Telemedicine: AI-powered otoscopes can be used in telemedicine settings, allowing healthcare providers to remotely diagnose and manage ear conditions.
    • Home monitoring: Some AI-powered otoscopes are designed for home use, enabling patients to monitor their ear health and share data with their doctors.

    4. ENHANCED EFFICIENCY AND ACCESSIBILITY:

    • Reduced workload: AI can automate the analysis of otoscope images, freeing up healthcare professionals’ time for other tasks.
    • Improved access to care: AI-powered otoscopes can be used in remote or underserved areas, increasing access to quality ear care.

    Examples of AI-powered otoscope applications:

    • HearScope: This smartphone-based otoscope uses AI to detect ear infections and other ear problems.
    • Otoscope with AI by Hiacinto: This otoscope features AI for image analysis and diagnostic support.
    • Anykit Digital Otoscope: This otoscope offers AI-powered diagnostics and a large screen for easy viewing.

    Benefits of AI in otoscopy:

    • Improved accuracy: AI can enhance diagnostic accuracy, leading to better treatment decisions and patient outcomes.
    • Increased efficiency: AI can automate tasks, saving time and resources for healthcare professionals.
    • Enhanced accessibility: AI-powered otoscopes can improve access to care for patients in remote or underserved areas.
    • Personalized care: AI can help provide personalized treatment recommendations and monitoring.

    The Future of AI in Otoscopy:

    AI is poised to revolutionize otoscopy in the years to come. We can expect to see:

    • More sophisticated AI algorithms: AI will continue to improve in its ability to detect a wider range of ear conditions and provide more accurate diagnoses.
    • Increased integration: AI will be integrated into more otoscope devices and healthcare systems, making it a standard part of ear care.
    • New applications: AI will be used to develop new applications for otoscopes, such as personalized hearing assessments and real-time monitoring of ear health.

    By embracing AI, the field of otoscopy can continue to advance, providing more accurate, efficient, and accessible ear care for patients worldwide

  • HOW TO CONNECT  AN OTOSCOPE THROUGH A USB PORT  TO AI

    HOW TO CONNECT  AN OTOSCOPE THROUGH A USB PORT  TO AI

    DIGITAL OTOSCOPE WITH AI
    DIGITAL OTOSCOPE WITH AI

     While you can’t directly plug a standard USB otoscope into an AI system, there are ways to achieve what you’re looking for:

    1. IMAGE CAPTURE AND ANALYSIS:

    • Capture images: Use your otoscope to capture images of the ear canal and eardrum. Since your otoscope has a USB port, it likely saves these images digitally.
    • Transfer images: Transfer the images to your computer.
    • Utilize AI software: Use AI-powered software or online platforms designed to analyze ear images. Some examples include:
      • SkinVision: This app analyzes photos of skin lesions, but some users have reported success using it for ear images as well (always consult a doctor for official diagnosis).
      • Google Lens: While not specifically for medical diagnosis, Google Lens can sometimes identify objects and patterns in images, which might offer some insights.
    • CONSULT A PROFESSIONAL:

      Always share the images and any AI analysis with a qualified healthcare professional for proper interpretation and diagnosis.

    2. UPGRADE  TO AN AI-POWERED OTOSCOPE:

    • Consider a new device: If you want a more integrated experience, consider investing in a digital otoscope with built-in AI, like the HearScope or Hiacinto AI otoscope. These devices offer seamless image capture, analysis, and even diagnostic support.

    3. EXPLORE TELEMEDICINE PLATFORMS:

    • Remote consultation: Some telemedicine platforms allow you to share images with a remote healthcare professional who can provide expert opinions and guidance. This can be particularly useful if you’re in an area with limited access to specialists.

    IMPORTANT CONSIDERATIONS:

    • Image quality: The quality of your otoscope images will significantly impact the accuracy of any AI analysis. Ensure your otoscope captures clear, well-lit images.
    • AI limitations: AI algorithms for otoscope image analysis are still under development. While they can be helpful tools, they are not a substitute for professional medical advice.
    • Data privacy: If you’re using online platforms or apps to analyze images, be sure to understand their data privacy policies.

    By combining your existing otoscope with these approaches, you can leverage the power of AI to gain deeper insights into ear health and enhance your diagnostic capabilities.

  • HOW TRANSFER DATA FROM THERMOSCAN 7 CRADLE

    HOW TRANSFER DATA FROM THERMOSCAN 7 CRADLE

    USB CABLE FOR CRADLE
    USB CABLE FOR CRADLE


    Welch-Allyn-Braun-ThermoScan-PRO-6000-Thermometer-Accessories
    Welch-Allyn-Braun-ThermoScan-PRO-6000-Thermometer-Accessories

    You’re looking to get the data from your Braun ThermoScan 7 cradle onto your computer! Here’s how to do it:

    1.    ENSURE YOU HAVE THE RIGHT CRADLE:

    Not all ThermoScan 7 cradles have USB connectivity. Only specific models, like the Braun ThermoScan 7 with Age Precision technology, come with a cradle that has a USB port for data transfer. Double-check your cradle to make sure it has this feature.

    2. CONNECT THE CRADLE:

    • Connect the USB cable: Plug one end of the USB cable into the cradle’s USB port and the other end into a USB port on your computer.

    3. INSTALL THE BRAUN SOFTWARE (IF NEEDED):

    • Check for Software: Some Braun ThermoScan 7 models may require you to install specific software from the Braun website to facilitate data transfer and management. Look for a CD that came with your thermometer or visit the Braun Healthcare website to download the appropriate software.

    4. ACCESS AND TRANSFER DATA:

    • Software Interface: If you have Braun’s software installed, it should recognize the connected cradle and allow you to access the stored temperature readings. The software might provide options to view, analyze, and export the data.
    • Direct Access (if available): In some cases, the cradle might appear as a removable storage device on your computer, allowing you to directly access the data files without needing special software.

    Troubleshooting:

    • Drivers: If your computer doesn’t recognize the cradle, you might need to install the appropriate USB drivers for your ThermoScan 7 model. Check the Braun website or the user manual for driver downloads.
    • Compatibility: Ensure your computer’s operating system is compatible with the cradle and any required software.
    • Cable: Try a different USB cable to rule out any issues with the cable itself.

    Important Notes:

    • Data Format: The format in which the temperature data is stored will depend on the specific model and software. It might be in a proprietary format, a standard spreadsheet format (like CSV), or a format specific to Braun’s software.
    • Data Management: Once you’ve transferred the data to your computer, you can use spreadsheet software, data analysis tools, or health management apps to organize, analyze, and visualize the temperature readings.

    By following these steps, you should be able to successfully transfer the temperature data from your Braun ThermoScan 7 cradle to your computer for further analysis and record-keeping.


  • THE RIGHT CRADLE TO GET THE DATA FROM YOUR BRAUN THERMOSCAN 7  

    THE RIGHT CRADLE TO GET THE DATA FROM YOUR BRAUN THERMOSCAN 7  


    CRADLE AND USB CABLE FOR THERMOSCAN
    CRADLE AND USB CABLE FOR THERMOSCAN


    You’re absolutely right to be specific about the cradle! Only certain Braun ThermoScan 7 models come with a cradle that allows data transfer. Here’s the one you need:

    BRAUN THERMOSCAN 7 WITH AGE PRECISION TECHNOLOGY

    • Look for the USB: This specific model usually comes with a cradle that has a distinct USB port on the side. This port is essential for connecting the cradle to your computer and transferring the stored temperature data.

    WHERE TO FIND IT:

    • Online Retailers: Search for “Braun ThermoScan 7 with Age Precision” on major online retailers like Amazon, Walmart, or Target.
    • Pharmacy Websites: Check the websites of pharmacies like CVS or Walgreens.
    • Braun’s Website: You might find it on Braun’s official website, though they often focus on newer models.

    IMPORTANT NOTES:

    • Older Models: Older ThermoScan 7 models without Age Precision technology typically don’t have cradles with USB connectivity.
    • Packaging: Carefully check the product description and images on the packaging or online listing to confirm that the cradle has a USB port.
    • Used Devices: If you’re buying a used ThermoScan 7, make sure the cradle is included and has the USB port.

    If you already have a ThermoScan 7 and aren’t sure if your cradle has USB, examine it closely for a USB port. If it doesn’t have one, you’ll unfortunately need to upgrade to the “with Age Precision” model to get the data transfer functionality.

  • THERMOMETERS WITH CLOUD CONNECTIVITY

    Braun ThermoScan 7 Ear thermometer - Age Precision Technology
    Braun ThermoScan 7 Ear thermometer – Age Precision Technology

    THERMOMETERS WITH CLOUD CONNECTIVITY

    You’re looking at the future of temperature tracking! Cloud-connected thermometers offer a range of benefits, from remote monitoring to AI-powered insights. Here are some of the leading options available:  

    1. WITHINGS THERMO:

    • SMART TEMPORAL THERMOMETER: This highly-rated thermometer uses 16 infrared sensors to accurately measure temperature from the temporal artery.  
    • APP INTEGRATION: Connects to the Withings Health Mate app via Wi-Fi, allowing you to track temperature readings over time, set reminders, and share data with healthcare providers.  
    • AGE-SPECIFIC GUIDANCE: Offers age-specific fever guidance for babies, children, and adults.  

    2. KINSA SMART EAR THERMOMETER:

    • FAST AND ACCURATE: Takes readings in just one second with accurate infrared technology.  
    • APP CONNECTIVITY: Connects to the Kinsa app via Bluetooth, providing personalized guidance, fever tracking, and medication reminders.  
    • Health Insights: The app offers insights into illness trends in your area and provides guidance based on your symptoms.  

    3. IHEALTH NO-TOUCH FOREHEAD THERMOMETER:

    • HYGIENIC AND CONVENIENT: Measures temperature without contact, making it ideal for families and healthcare settings.  
    • APP AND CLOUD STORAGE: Connects to the iHealth MyVitals app via Bluetooth, allowing you to store and track readings in the cloud.  
    • MULTIPLE USER PROFILES: Supports multiple user profiles for easy family tracking.  

    4. BRAUN THERMOSCAN 7 (WITH OPTIONAL CRADLE):

    • ACCURATE EAR THERMOMETER: Known for its accuracy and pre-warmed tip for comfort.
    • CONNECTIVITY (WITH CRADLE): While the thermometer itself doesn’t have built-in connectivity, the optional cradle allows for data transfer to a computer via USB. This data can then be manually uploaded to cloud storage or health apps.

    5. TEMPTRAQ:

    • CONTINUOUS MONITORING: This wearable patch continuously monitors temperature and sends data to a smartphone app via Bluetooth.  
    • IDEAL FOR BABIES AND CHILDREN: Provides peace of mind for parents by allowing constant temperature monitoring without disturbing the child.
    • FEVER ALERTS: Sends alerts to your smartphone if a fever is detected.

    KEY FACTORS TO CONSIDER:

    • ACCURACY: Look for thermometers with proven accuracy and reliable technology.
    • CONNECTIVITY: Choose a thermometer with the connectivity that suits your needs (Wi-Fi, Bluetooth, or USB with optional cradle).
    • APP FEATURES: Consider the features offered by the accompanying app, such as temperature tracking, medication reminders, and health insights.
    • EASE OF USE: Choose a thermometer that is user-friendly and easy to clean.
    • PRICE: Compare prices and features to find the best value for your needs.

    By exploring these options and considering your specific requirements, you can find the perfect cloud-connected thermometer to track temperature, monitor health, and gain valuable insights.


  • OTOSCOPE WITH A USB PORT AND  WANT TO CONNECT THIS OTOSCOPE TO AI

     OTOSCOPE WITH A USB PORT AND  WANT TO CONNECT THIS OTOSCOPE TO AI

    OTOSCOPE VIDEO USB
    OTOSCOPE VIDEO USB


    OTOSCOPE WITH USB
    OTOSCOPE WITH USB

    It’s awesome that you’re thinking about how to enhance your otoscope with AI! While you can’t directly plug a standard USB otoscope into an AI system, there are ways to achieve what you’re looking for:

    1. IMAGE CAPTURE AND ANALYSIS:

    • Capture images: Use your otoscope to capture images of the ear canal and eardrum. Since your otoscope has a USB port, it likely saves these images digitally.
    • Transfer images: Transfer the images to your computer.
    • Utilize AI software: Use AI-powered software or online platforms designed to analyze ear images. Some examples include:
      • SkinVision: This app analyzes photos of skin lesions, but some users have reported success using it for ear images as well (always consult a doctor for official diagnosis).
      • Google Lens: While not specifically for medical diagnosis, Google Lens can sometimes identify objects and patterns in images, which might offer some insights.
    • CONSULT A PROFESSIONAL:

      Always share the images and any AI analysis with a qualified healthcare professional for proper interpretation and diagnosis.

    2. UPGRADE  TO AN AI-POWERED OTOSCOPE:

    • Consider a new device: If you want a more integrated experience, consider investing in a digital otoscope with built-in AI, like the HearScope or Hiacinto AI otoscope. These devices offer seamless image capture, analysis, and even diagnostic support.

    3. EXPLORE TELEMEDICINE PLATFORMS:

    • Remote consultation: Some telemedicine platforms allow you to share images with a remote healthcare professional who can provide expert opinions and guidance. This can be particularly useful if you’re in an area with limited access to specialists.

    IMPORTANT CONSIDERATIONS:

    • Image quality: The quality of your otoscope images will significantly impact the accuracy of any AI analysis. Ensure your otoscope captures clear, well-lit images.
    • AI limitations: AI algorithms for otoscope image analysis are still under development. While they can be helpful tools, they are not a substitute for professional medical advice.
    • Data privacy: If you’re using online platforms or apps to analyze images, be sure to understand their data privacy policies.

    By combining your existing otoscope with these approaches, you can leverage the power of AI to gain deeper insights into ear health and enhance your diagnostic capabilities.


  • DERMATOSCOPE WITH AI BUILT IN

    DERMATOSCOPE WITH AI BUILT IN

    Interested in the cutting edge of dermatology! AI-powered dermatoscopes are revolutionizing skin examinations, making them more accurate and efficient. Here’s a breakdown of this exciting technology:

    WHAT IT IS:

    A dermatoscope with AI combines a traditional dermatoscope (a handheld device used to visualize skin lesions) with artificial intelligence algorithms. This allows for:

    • High-quality imaging: The dermatoscope captures detailed images of the skin lesion.
    • AI-powered analysis: Sophisticated algorithms analyze the images, identifying patterns and features that may indicate malignancy.
    • Risk assessment: The AI provides a risk assessment for the lesion, helping dermatologists determine if a biopsy is necessary.
    • Diagnostic support: The AI assists in diagnosis, offering potential diagnoses and suggesting further investigations.

    BENEFITS:

    • Improved accuracy: AI algorithms can detect subtle features that may be missed by the human eye, leading to earlier and more accurate diagnoses of skin cancer.
    • Increased efficiency: AI can analyze images quickly, speeding up the diagnostic process.
    • Reduced unnecessary biopsies: By providing risk assessments, AI can help reduce the number of unnecessary biopsies, saving patients time and discomfort.
    • Enhanced patient care: AI-powered dermatoscopes can lead to better patient outcomes by enabling earlier diagnosis and treatment of skin cancer.
    • Accessibility: Some AI dermatoscopes are designed to be used with smartphones, increasing accessibility to this technology.

    EXAMPLES OF DERMATOSCOPES WITH AI:

    • FotoFinder skeen: This wireless dermatoscope uses AI to analyze skin lesions and provide risk assessments for melanoma.
    FOTOFINDER DERMATOSCOPE AI BUILT IN
    FOTOFINDER DERMATOSCOPE AI BUILT IN

    FotoFinder skeen dermatoscope

    • METAOPTIMA MOLESCOPE:

      This smartphone-attachable dermatoscope uses AI to help users track moles and detect suspicious changes.


    MetaOptima MoleScope
    MetaOptima MoleScope DERMATOSCOPE WITH AI


    • SkinVision: This app uses AI to analyze photos of skin lesions taken with a smartphone camera and provides risk asses


    SkinVision app for skin cancer detection


    SKINVISION DERMATOSCOPE WITH AI
    SKINVISION DERMATOSCOPE WITH AI

    Future potential:

    As AI technology continues to evolve, we can expect even more sophisticated AI-powered dermatoscopes in the future. These devices may be able to:

    • DETECT A WIDER RANGE OF SKIN CONDITIONS:

      Beyond skin cancer, AI could be used to diagnose other skin conditions like eczema, psoriasis, and acne.

    • Provide personalized treatment recommendations: AI could analyze individual patient data and suggest personalized treatment plans.
    • Enable self-monitoring: AI-powered apps and devices could allow patients to monitor their skin at home and seek medical attention when necessary.

    Important note: While dermatoscopes with AI offer many benefits, they are not a replacement for professional medical advice. If you have any concerns about a skin lesion, it’s essential to consult with a qualified dermatologist.

  • DIGITAL OTOSCOPE AI BUILT IN

    DIGITAL OTOSCOPE AI BUILT IN

    DIGITAL OTOSCOPE WITH AI
    DIGITAL OTOSCOPE WITH AI

    Digital otoscopes with built-in AI are revolutionizing how ear examinations are conducted and diagnosed. These innovative devices combine traditional otoscopy with artificial intelligence algorithms to provide more accurate and efficient ear care.

    HOW IT WORKS:

    • High-quality imaging: The digital otoscope captures images and videos of the ear canal and eardrum, often in high definition.
    • AI-powered analysis: The built-in AI algorithms analyze the images and videos, identifying potential abnormalities such as ear infections, earwax buildup, and even certain types of tumors.
    • Diagnostic support: The AI provides diagnostic support to healthcare professionals by highlighting areas of concern and suggesting possible diagnoses. This can help to improve diagnostic accuracy and reduce the need for specialist referrals.
    • Patient education: Some digital otoscopes with AI can also be used to educate patients about their ear health by providing visual representations of their ear canal and eardrum.

    BENEFITS:

    • Improved accuracy: AI algorithms can detect subtle abnormalities that may be missed by the human eye, leading to more accurate diagnoses.
    • Increased efficiency: AI can analyze images quickly, reducing the time needed for an ear examination.
    • Reduced referrals: By providing diagnostic support, AI can help to reduce the need for specialist referrals, saving time and resources.
    • Enhanced patient care: Digital otoscopes with AI can help to improve patient care by providing more accurate diagnoses and enabling better-informed treatment decisions.
    • Remote diagnosis: Some AI-powered otoscopes allow for remote diagnosis, which can be particularly beneficial in areas with limited access to healthcare.

    EXAMPLES OF DIGITAL OTOSCOPES WITH AI:

    • HearScope: This smartphone-based otoscope uses AI to detect ear infections and other ear problems.
    • Otoscope with AI by Hiacinto: This otoscope features a built-in gyroscope for image stabilization and AI for image analysis.
    • Anykit Digital Otoscope: This otoscope offers a large screen for easy viewing and AI-powered diagnostics.

    FUTURE POTENTIAL:

    As AI technology continues to evolve, we can expect to see even more sophisticated digital otoscopes with AI in the future. These devices may be able to detect a wider range of ear conditions, provide more personalized treatment recommendations, and even be used for self-diagnosis at home.

  • WHAT TO DO  TO TRANSFORM MY MEDICAL DEVICE WITHOUT CONNECTIVITY IN A MEDICAL DEVICE WITH AI BUILT IN


    WHAT TO DO  TO TRANSFORM MY MEDICAL DEVICE WITHOUT CONNECTIVITY IN A MEDICAL DEVICE WITH AI BUILT IN

    OTOSCOPE DIGITAL
    OTOSCOPE DIGITAL

    Transforming a non-connected medical device into an AI-powered one is a significant undertaking that involves several key steps:

    1. DATA ACQUISITION AND INTEGRATION

    • Identify Relevant Data: Determine what data your device can generate or collect that would be useful for AI analysis. This could include sensor readings, images, patient inputs, or treatment parameters.
    • Incorporate Sensors: If your device doesn’t already have sensors, you’ll need to add them to collect the necessary data.
    • Data Connectivity: Establish a way to get the data from your device to a system where the AI can process it. This could involve:
      • Direct connection: Ethernet, USB, or other wired connection.
      • Wireless connectivity: Wi-Fi, Bluetooth, or cellular.
      • Indirect transfer: Storing data on a removable medium (like an SD card) for later transfer.

    2. AI MODEL DEVELOPMENT

    • Define AI Goals: Clearly specify what you want the AI to do. This could be diagnosis, treatment optimization, predictive maintenance, or personalized medicine.
    • Data Preprocessing: Clean, organize, and format the collected data to make it suitable for AI training.  
    • Algorithm Selection: Choose the appropriate AI algorithms (e.g., machine learning, deep learning) based on your goals and data characteristics.
    • Model Training: Train the AI model using your prepared data. This may require a large, high-quality dataset.
    • Model Validation and Testing: Rigorously evaluate the model’s performance on unseen data to ensure accuracy, reliability, and safety.  

    3. DEVICE INTEGRATION AND DEPLOYMENT

    • Hardware Upgrades: Your device might need processing power upgrades to run the AI model locally, or you may opt for cloud-based processing.
    • Software Development: Develop the software to integrate the AI model into your device’s existing functionality.
    • User Interface: Design a user-friendly interface to present AI insights to healthcare professionals or patients.
    • Regulatory Compliance: Ensure your AI-powered device meets all relevant medical device regulations and standards (e.g., FDA approval in the US).

    4. ONGOING MONITORING AND IMPROVEMENT

    • Real-world Data Collection: Continue collecting data from the device in use to further train and refine the AI model.  
    • Performance Monitoring: Track the AI’s performance and identify areas for improvement or potential biases.  
    • Software Updates: Regularly update the device’s software to incorporate model improvements and address any issues.

    IMPORTANT CONSIDERATIONS:

    • Privacy and Security: Implement robust data privacy and security measures to protect sensitive patient information.  
    • Ethical Implications: Carefully consider the ethical implications of using AI in your medical device, including issues of bias, transparency, and accountability.
    • Clinical Validation: Conduct clinical trials to demonstrate the safety and effectiveness of your AI-powered device.

    Example:

    Let’s say you have a non-connected blood pressure monitor. To transform it with AI, you could:

    1.    Add Connectivity: Integrate Bluetooth to transmit readings to a smartphone app.

    2.  Develop AI Model: Train an AI model to analyze blood pressure trends and detect potential heart conditions.

    3.  Device Integration: Update the monitor’s firmware to display AI-powered alerts on the device screen.

    4.  App Development: Create a smartphone app to provide detailed AI insights, personalized recommendations, and remote monitoring capabilities.

    By carefully considering these steps and addressing the associated challenges, you can successfully transform your medical device with the power of AI.